Queen Of Color
By Dawn Omboy
Hats are fun. We all have plopped one on our heads from time to time. Wouldn’t it be fun to fashion a hat on your dog or on a client’s dog for special occasions? Let’s discover how to make a hat that Fido won’t be able to shake off. Follow along with this cute how–to pictorial as I show you how to create and decorate a cute spring hat for Easter from an overgrown head of hair.
Let’s start by dying the hair on the top of head. I like pink, so I have chosen to use an OPAWZ Semi–permanent bubble gum pink that will come out of the coat in about 8 to 10 washes.
Fig. 1) Wearing gloves and using a tint brush, start with the outer edge and line it with dye. Next, block or protect the side of the face as you pull down the first outer section of hair and apply the dye. I usually use paper towel just because it is always handy and I can just chuck it when I am finished. If you are worried about the color bleeding through, you can use plastic wrap or foil. I didn’t use foil because it was heavier and not staying in place as easily as the paper towels did.
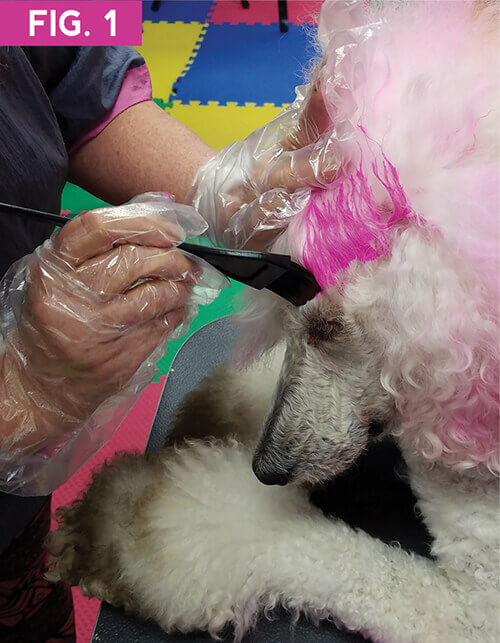
Fig. 2) Continue separating the hair in lines with the end of your tint brush and then applying the dye to each side of each section as you go. You don’t have to saturate the hair, just use enough to cover. Fold each line over onto the one before as you move all the way across the top of the head.
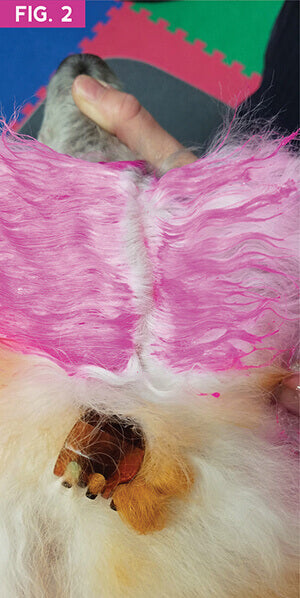
Fig. 3) Once you have reached the other side, you can run your gloved fingers through, making sure you have all the hair within the area nicely covered.
Wait a short time for the hair to become stained with the dye before rinsing. I only waited 10 minutes for this one, as I wanted to make sure I had a nice pastel pink for my Easter hat. You will want to make sure to stretch dry the hair straight afterwards and then you will be ready to shape and decorate your hat.
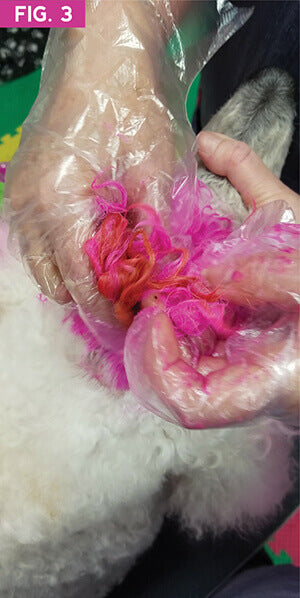
Fig. 4) You will need a strong–hold hairspray of your choice. Then, placing your hand to shield the dog’s eyes, spray a layer of hairspray to the front and sides.
Fig 5.) Next, pull out a circle of hair all the way around to create the hat brim and spray so you can either shape it with your hands or use a flat iron. Then spray the center circle of hair standing up to create the top of your hat, shaping as you go. You can use your scissors if you need to smooth off the top, then spray again.
Fig 6) With the hat now shaped, you can finish it off by decorating it in a number of ways. We first tried a plain hat with a tied on hatband and a hair feather sticking out of it.

Fig. 7) Then we added decorative flowers and a butterfly clip with some added airbrushing for a really cute contrast of colors. I use a small airbrush machine and temporary ink for this part. Keep adding hairspray as needed to really make this spray–up hold well for you.
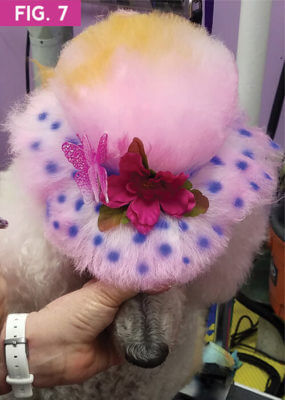
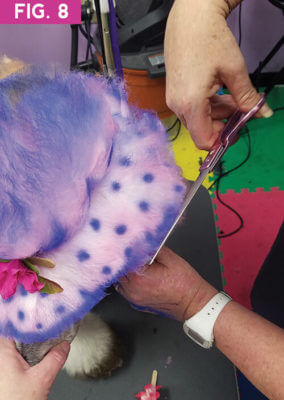
Fig. 8) Sharpen up the edges with your scissors to make your hat look nice and neat. How much fun is this! ✂
